Happy valentines day my dear friends and family 🍫❤️🎂. Today's recipe is no maida, no oven, egg less chocolate cake using semolina/sooji/rava. This is my first cake recipe in blog and my second cake. Before starting recipe I would like to tell you that I am not professional in baking I am just beginner. If you found any mistake please do guide me 🤗. Though I know cake preparation process I never tried. Thought to start baking and I prepared this cake for our anniversary, cake tastes very yummy, hubby and neighbors too liked taste, so I dared to post it today. My first cake is tutti frutti rava cake, got some experience to prepare this chocolate cake in the same.Hope you all like it.

Few terms we use in baking are -
"Frosting" is a thick, fluffy mixture used to coat the outside of a cake.
"Icing" is generally thinner and glossier used to glaze cakes, pastries and taste more sugar than frosting.
"Ganache" is a glaze, icing, sauce or filling for cakes, pastries made from chocolate and cream(information from google). I prepared my first cake using steel lunch box in pressure cooker, now one of bakery brother @Jolarpet bought this aluminum cake mould and it is not fit in my pressure cooker so I prepared in Kadai. Process is same for both I am sharing both the process 😍🤗.

I used frosting for piping on reverse side of big cake and small cake is plain rava chocolate cake. If you want you can do frosting otherwise serve like that, as shown below...

Sooji chocolate cake in pressure cooker
Preparation Time : 30 minutes
Cook Time : 35 - 40 minutes
Serves : 400 gms cake
Category : cakes
Recipe Cuisine: Indian
Main ingredients : Sooji, cocoa powder
Author : ArunaSarasChandra
Ingredients
For cake
Rava/semolina/sooji - 1 glass/cup
Sugar powder - 1/2 glass/cup
Condensed milk/ milk maid - 3 to 4 tsp
Butter - 1/2 cup
Yogurt/curd - 1 cup
water/milk - 1 cup(accordingly)
Or vegetable oil - 1/2 cup
cocoa powder - 2 tsp
Chocolate powder - 2tsp(optional)
Baking powder - 3/4 tsp
Baking soda - 1/2 tsp
vanilla essence - 3 drops(optional)
Dry fruits(almonds, dates,tuttti frutti ) - 1/4 cup
For ganache
Butter - 11/2 tsp
Fresh cream - 1 cup
Milkmaid - 1/2 cup
Cocoa powder - 2 tsp
Other
Salt - 1 cup
Instructions
1) Take a mixer jar powder sugar.

2) Take a deep bowl add butter(butter in room temperature).
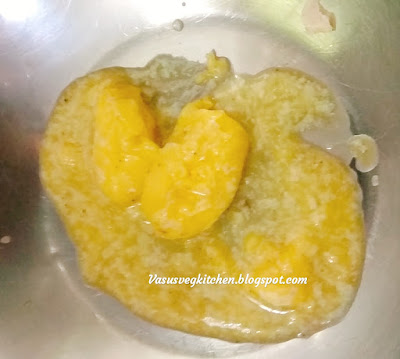
3) Add powdered sugar to the above and mix everything well.

4) Now add milkmaid to the above.

5) Mix everything well, till it becomes fluffy as shown below.

6) Take a mixer jar add semolina/rava grind it to fine powder.

7) Add above semolina into sugar mix.

8) Mix everything well by adding curd/yogurt.

9) Mixeverything well.

10) Add cocoa powder to the above.

11) mix the above well and add chocolate powder. (This step is optional if you do not have chocolate powder). Also add few drops of vanilla essence and mix well. Adding it is also optional.

12) Mix the above well and keep it aside for 15 minutes by closing lid.

13) I am showing baking in both pressure cooker and Kadai. Meanwhile take a Kadai add salt and heat it on medium to low flames for 10 minutes.
Kadai:

Pressure cooker:

14) Now chop the dry fruits and keep it ready.

15) Take a mould apply oil to it properly, so that cake will come out easily.

15) After 15 minutes, batter will become bit fluffy now add baking soda and baking powder.

16) Mix everything well by adding milk/ water to get batter consistency.


17) Now add half part of dry fruits and tutty fruity to the batter and mix everything well.

18) Add the batter into mould and spread remaining dry fruits and tutty fruity.

19) Place stand in the Kadai /
pressure cooker.


In pressure cooker

20) Close the lid and bake it on medium flames for 8 minutes and later cook 30 - 35 minutes on low flames.

21) In the above pic you can see dry fruits sinked in the cake, as I opened lid many times to take pics.. So d't do the same mistake🤗. After 30 minutes check the cake by inserting tooth pic or knife as shown below. Some batter sticked to tooth pick so we have to bake some more time.

22) After baking 5 to 7 more minutes I inserted tooth pick again now tooth pick came out clearly without sticking batter. Switch off the flames and remove mould outside let it cool completely.

23) Then take a knife and scratch it all the sides and place one plate on it and reverse the mould as shown below.

24) Now tap on the mould gently and remove the mould slowly and reverse it.

25) cake on pressure cooker to baked.

26) demould the cake and reverse it. Hubby ate small part from small cake I can't stop him 😍🤗.

27) You can stop here and serve rava chocolate cake just decorating with nuts and tuttti frutti as per your choice. (I decorated reverse side). You do reverse the cake and serve.

28) For ganache follow the process. Take a bowl add fresh cream( I used preserved malai/fresh cream) and condensed milk /milkmaid, beat it with beater or spatula till it becomes fluffy.

29) Now add cocoa powder to the above and mix everything well.

30) Take a pan add butter and then add the above prepared mixture.

31) Mix the above well on very low flames.

32) Mix everything well till the mixture become thick.


33)let the above cool completely outside or in refrigerator. Then take a butter cover or any piping bag and add the above. (I preserved butter cover which I bought cookies from bakery).

34) Close the above as shown below.

35) Now decorate the cake as per your wish. I decorated as shown below.

Note
* As this is semolina/rava cake it is not that smooth as maida. But it is moist when baked at coorect temperature.
* You can serve rava chocolate cake without frosting too.
* Using chocolate powder is optional.
* using milk maid is also optional. Use 3/4rth to 1 cup of sugar if you are not adding condensed milk/milkmaid.
Tips
** Follow exact quantity of ingredients otherwise cake texture and taste will change.
** Grind semolina / rava to fine powder to get good texture. If already using fine rava skip this step.
** Add water/ milk according to prepare thick running batter. Quantity of water/milk depends on type of rava you used.
** Apply oil to the mould well otherwise cake will stick to bottom and sides of mould. You can also dust some flour or place butter paper too.
** Donot over heat your pressure cooker / Kadai cake will become hard (from corner and bottom).
** To decorate heart shape on cake, hubby made heart shape mould using tin foil ❤️😍.
** If you Donot have vanilla essence you can skip adding or you can a pinch of coffee powder mixed in little water. Add accordingly ot skip it.
** I checked why dry fruits sinked in cake, got solution that mix the flour(sooji/rava) on dry fruits and nuts and then spread on cake so that they do not sink, have to check for next baking.
Hope this post with step by step pics helps you to prepare tasty and moist rava chocolate cake. Planning to post many more cake and baking recipes with your support 😍.
Also check few sweet and starter recipes by clicking link below the pic..
 Wheat flour carrot cake
 Veg Chow mein noodles


Few terms we use in baking are -
"Frosting" is a thick, fluffy mixture used to coat the outside of a cake.
"Icing" is generally thinner and glossier used to glaze cakes, pastries and taste more sugar than frosting.
"Ganache" is a glaze, icing, sauce or filling for cakes, pastries made from chocolate and cream(information from google). I prepared my first cake using steel lunch box in pressure cooker, now one of bakery brother @Jolarpet bought this aluminum cake mould and it is not fit in my pressure cooker so I prepared in Kadai. Process is same for both I am sharing both the process 😍🤗.

I used frosting for piping on reverse side of big cake and small cake is plain rava chocolate cake. If you want you can do frosting otherwise serve like that, as shown below...

Sooji chocolate cake in pressure cooker
Preparation Time : 30 minutes
Cook Time : 35 - 40 minutes
Serves : 400 gms cake
Category : cakes
Recipe Cuisine: Indian
Main ingredients : Sooji, cocoa powder
Author : ArunaSarasChandra
Ingredients
For cake
Rava/semolina/sooji - 1 glass/cup
Sugar powder - 1/2 glass/cup
Condensed milk/ milk maid - 3 to 4 tsp
Butter - 1/2 cup
Yogurt/curd - 1 cup
water/milk - 1 cup(accordingly)
Or vegetable oil - 1/2 cup
cocoa powder - 2 tsp
Chocolate powder - 2tsp(optional)
Baking powder - 3/4 tsp
Baking soda - 1/2 tsp
vanilla essence - 3 drops(optional)
Dry fruits(almonds, dates,tuttti frutti ) - 1/4 cup
For ganache
Butter - 11/2 tsp
Fresh cream - 1 cup
Milkmaid - 1/2 cup
Cocoa powder - 2 tsp
Other
Salt - 1 cup
Instructions
1) Take a mixer jar powder sugar.

2) Take a deep bowl add butter(butter in room temperature).

3) Add powdered sugar to the above and mix everything well.

4) Now add milkmaid to the above.

5) Mix everything well, till it becomes fluffy as shown below.

6) Take a mixer jar add semolina/rava grind it to fine powder.

7) Add above semolina into sugar mix.

8) Mix everything well by adding curd/yogurt.

9) Mixeverything well.

10) Add cocoa powder to the above.

11) mix the above well and add chocolate powder. (This step is optional if you do not have chocolate powder). Also add few drops of vanilla essence and mix well. Adding it is also optional.

12) Mix the above well and keep it aside for 15 minutes by closing lid.

13) I am showing baking in both pressure cooker and Kadai. Meanwhile take a Kadai add salt and heat it on medium to low flames for 10 minutes.
Kadai:

Pressure cooker:

14) Now chop the dry fruits and keep it ready.

15) Take a mould apply oil to it properly, so that cake will come out easily.

15) After 15 minutes, batter will become bit fluffy now add baking soda and baking powder.

16) Mix everything well by adding milk/ water to get batter consistency.


18) Add the batter into mould and spread remaining dry fruits and tutty fruity.

19) Place stand in the Kadai /
pressure cooker.


In pressure cooker

20) Close the lid and bake it on medium flames for 8 minutes and later cook 30 - 35 minutes on low flames.

21) In the above pic you can see dry fruits sinked in the cake, as I opened lid many times to take pics.. So d't do the same mistake🤗. After 30 minutes check the cake by inserting tooth pic or knife as shown below. Some batter sticked to tooth pick so we have to bake some more time.

22) After baking 5 to 7 more minutes I inserted tooth pick again now tooth pick came out clearly without sticking batter. Switch off the flames and remove mould outside let it cool completely.

23) Then take a knife and scratch it all the sides and place one plate on it and reverse the mould as shown below.

24) Now tap on the mould gently and remove the mould slowly and reverse it.

25) cake on pressure cooker to baked.

26) demould the cake and reverse it. Hubby ate small part from small cake I can't stop him 😍🤗.

27) You can stop here and serve rava chocolate cake just decorating with nuts and tuttti frutti as per your choice. (I decorated reverse side). You do reverse the cake and serve.

28) For ganache follow the process. Take a bowl add fresh cream( I used preserved malai/fresh cream) and condensed milk /milkmaid, beat it with beater or spatula till it becomes fluffy.

29) Now add cocoa powder to the above and mix everything well.

30) Take a pan add butter and then add the above prepared mixture.

31) Mix the above well on very low flames.

32) Mix everything well till the mixture become thick.


33)let the above cool completely outside or in refrigerator. Then take a butter cover or any piping bag and add the above. (I preserved butter cover which I bought cookies from bakery).

34) Close the above as shown below.

35) Now decorate the cake as per your wish. I decorated as shown below.

Note
* As this is semolina/rava cake it is not that smooth as maida. But it is moist when baked at coorect temperature.
* You can serve rava chocolate cake without frosting too.
* Using chocolate powder is optional.
* using milk maid is also optional. Use 3/4rth to 1 cup of sugar if you are not adding condensed milk/milkmaid.
Tips
** Follow exact quantity of ingredients otherwise cake texture and taste will change.
** Grind semolina / rava to fine powder to get good texture. If already using fine rava skip this step.
** Add water/ milk according to prepare thick running batter. Quantity of water/milk depends on type of rava you used.
** Apply oil to the mould well otherwise cake will stick to bottom and sides of mould. You can also dust some flour or place butter paper too.
** Donot over heat your pressure cooker / Kadai cake will become hard (from corner and bottom).
** To decorate heart shape on cake, hubby made heart shape mould using tin foil ❤️😍.
** If you Donot have vanilla essence you can skip adding or you can a pinch of coffee powder mixed in little water. Add accordingly ot skip it.
** I checked why dry fruits sinked in cake, got solution that mix the flour(sooji/rava) on dry fruits and nuts and then spread on cake so that they do not sink, have to check for next baking.
Hope this post with step by step pics helps you to prepare tasty and moist rava chocolate cake. Planning to post many more cake and baking recipes with your support 😍.
Also check few sweet and starter recipes by clicking link below the pic..


Paneer Tikka


 Vaamu Aaku bajji

 Ellu Bella Mix
 Pineapple Sheera

 Ragi Peanut ladoo


 Sabudana Coconut Ladoo
 Almond Mango Sandesh

 Puffed Rice/Maramarala LAdoo
 Kaju Katli


Hope you like this delicious, moist and scrumptious healthy version Rava chocolate cake. Give it a try and drop your comments and pics in inbox.
Also follow me on
In facebook @Facebook
In Google+ @Google+
In pintrest @pintrest
In Instagram @Instagram Also drop your feedback 🤗😍.
You can also search recipe in BetterButter
in Indiblogger
in Plattershare
in MyTaste
Also follow me on
In facebook @Facebook
In Google+ @Google+
In pintrest @pintrest
In Instagram @Instagram Also drop your feedback 🤗😍.
You can also search recipe in BetterButter
in Indiblogger
in Plattershare
in MyTaste
Thanks for visiting my blog,
ArunaSaraschandra 😄