
Falooda is popular indian dessert, it is prepared by mixing falooda seeds (as main ingredient), rose syrup and any fruits or fruit jelly's and falooda semiya. Falooda seeds is also known as sabja seeds/ tukmaria seeds. I started using sabja seeds last year to reduce my body heat. After knowing the advantages of using sabja seeds it became part in my kitchen. Sabja seeds are power pack of vitamins, minerals and many but no calories🤗🤗. The thing which attracted me is it helps in weight loss😍😉. Today I'm preparing falooda in mango flavour using fresh mangoes and roohafz.. Also check my sweet/dessert recipe s🤗.
Mango Lassi
Moong dal kheer
Kaju katli
Almond semiya kheer
Dates and dry fruit burfi


Mangoo Falooda
Preparation Time : 25 min
Total Time : 25 minutes
Serves : 2 glasses
Recipe Category: Desserts
Recipe Cuisine: Indian
Author: Aruna
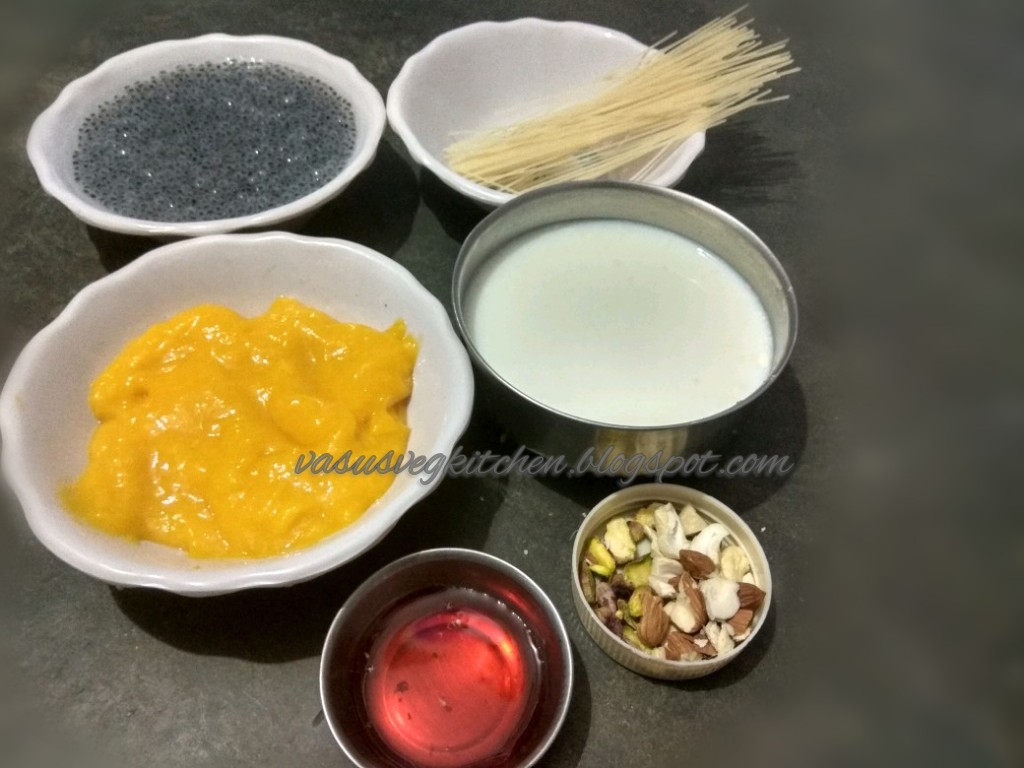
Ingredients
Sabja/ Falooda seeds - 2tsp
Mango puree - 1 cup
Boiled and cooled milk - 1 cup
Long vermicelli/ vermicelli/falooda vermicelli - small cup or few pieces
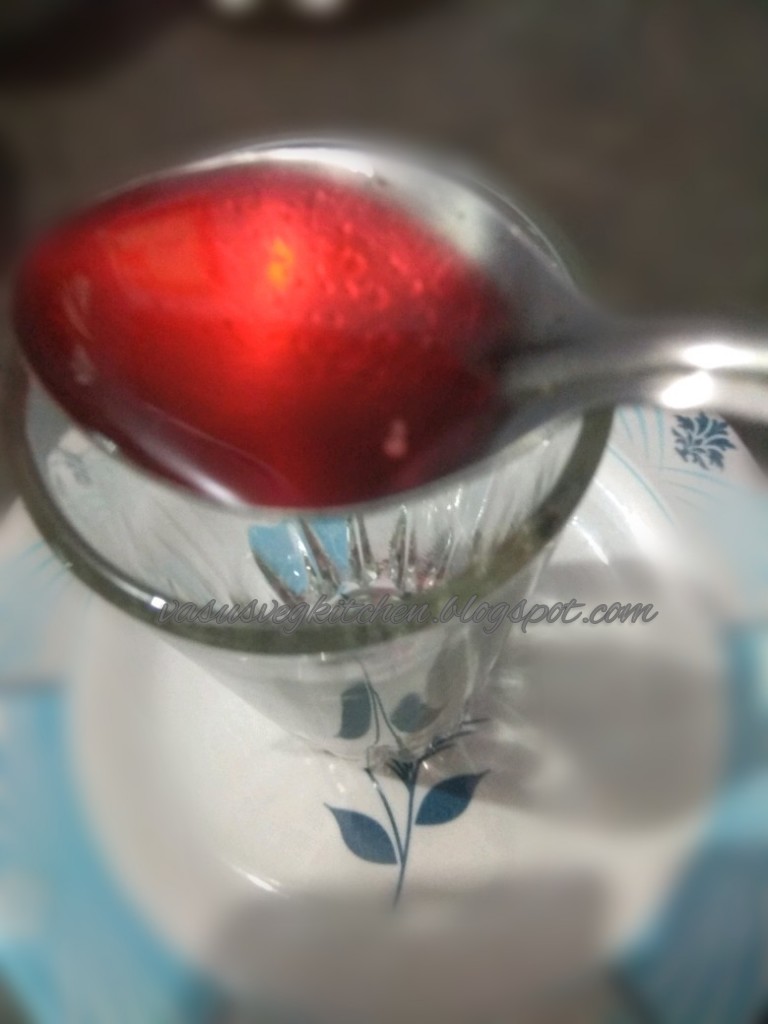
Rooh afza/ rose syrup - half cup
Sugar - 1/2 tsp ( optional)
Dry fruits chopped - 1 tsp
Main ingredients pic

Preparation
1) Take sabja seeds in a bowl.

2) Add 1 big glass water to the sabja seeds and soak it for 30 minutes.

3) Take long vermicelli in a bowl add 1/2 glass water and boil it.

4)Add 1/4 tsp or less sugar when the vermicelli becomes soft, switch off flame. Drain water and wash with cold water and keep it ready.

5) Cut mangoes into pieces and make it puree using mixer jar.Add sugar if mangoes are not much sweet. I did not added sugar.

6) In a serving glass add rooh afzha syrup.

7) Then add 2tsp of falooda seeds.

8) Add cooked sweetened long vermicelli on the sabja seeds slowly.

9) Add mango puree on semiya by spreading on it.

9) Add milk on mango puree slowly.


Yummy healthy and chilled Mango falooda is ready to taste🤗😋😋.
Note
* You can use mango ice cream or any ice cream available on the top of dessert. Mango ice cream is preferred as it is mango flavoured.
* You can use falooda semiya, if it is not available use vermicelli. I used long vermicelli.
* Adding sugar to vermicelli is optional.
* You can use rose syrup instead of roohafza. If both not available no problem, just skip it😄.
* Adding dry fruits is also optional, but healthy I prefer any of the dry fruit.
* You can also use mango jelly.
* If arranging is disturbed(as me😉) while repeating process , no probs just chill it will taste good .
Tips
◆ Adding small amount of sugar to vermicelli gives taste. But it's optional.
◆ Do not be rush while adding ingredients, it will disturb the texture. For falooda texture is important while serving. But while having no rules 😆.
Health benifts of falooda seeds
● They helps in burning metabolism and boost weight loss.
● Good for digestion
● Reduce body heat
● controls blood sugar levels
● Treats acidity and heart Burns
● Good for healthy skin and hair etc.,
Also follow me
In facebook @Facebook
In Google+ @Google+
In pintrest @pintrest
Also drop your feedback 🤗😍.
Thanks for visiting my blog,
ArunaSaraschandra 😄
Mango Lassi
Moong dal kheer
Kaju katli
Almond semiya kheer
Dates and dry fruit burfi


Mangoo Falooda
Preparation Time : 25 min
Total Time : 25 minutes
Serves : 2 glasses
Recipe Category: Desserts
Recipe Cuisine: Indian
Author: Aruna
Ingredients
Sabja/ Falooda seeds - 2tsp
Mango puree - 1 cup
Boiled and cooled milk - 1 cup
Long vermicelli/ vermicelli/falooda vermicelli - small cup or few pieces
Rooh afza/ rose syrup - half cup
Sugar - 1/2 tsp ( optional)
Dry fruits chopped - 1 tsp
Main ingredients pic
Preparation
1) Take sabja seeds in a bowl.

2) Add 1 big glass water to the sabja seeds and soak it for 30 minutes.

3) Take long vermicelli in a bowl add 1/2 glass water and boil it.

4)Add 1/4 tsp or less sugar when the vermicelli becomes soft, switch off flame. Drain water and wash with cold water and keep it ready.

5) Cut mangoes into pieces and make it puree using mixer jar.Add sugar if mangoes are not much sweet. I did not added sugar.

6) In a serving glass add rooh afzha syrup.
7) Then add 2tsp of falooda seeds.

8) Add cooked sweetened long vermicelli on the sabja seeds slowly.

9) Add mango puree on semiya by spreading on it.


10) Repeat the above process . Atlast add chopped mango pieces and dry fruits.

Yummy healthy and chilled Mango falooda is ready to taste🤗😋😋.
Note
* You can use mango ice cream or any ice cream available on the top of dessert. Mango ice cream is preferred as it is mango flavoured.
* You can use falooda semiya, if it is not available use vermicelli. I used long vermicelli.
* Adding sugar to vermicelli is optional.
* You can use rose syrup instead of roohafza. If both not available no problem, just skip it😄.
* Adding dry fruits is also optional, but healthy I prefer any of the dry fruit.
* You can also use mango jelly.
* If arranging is disturbed(as me😉) while repeating process , no probs just chill it will taste good .
Tips
◆ Adding small amount of sugar to vermicelli gives taste. But it's optional.
◆ Do not be rush while adding ingredients, it will disturb the texture. For falooda texture is important while serving. But while having no rules 😆.
Health benifts of falooda seeds
● They helps in burning metabolism and boost weight loss.
● Good for digestion
● Reduce body heat
● controls blood sugar levels
● Treats acidity and heart Burns
● Good for healthy skin and hair etc.,
Also follow me
In facebook @Facebook
In Google+ @Google+
In pintrest @pintrest
Also drop your feedback 🤗😍.
Thanks for visiting my blog,
ArunaSaraschandra 😄


